My first couple of Santa and the Mrs. is done. I know I’m cutting this really close to the wire, but I’m just continuing to put one stitch in front of the other and keep sewing along. The next two will get done, I’m giving myself a week for each one.
If I wasn’t so fussy about details I suppose I could flog them off, but I’m not that way inclined. It’s a customer and they expect the best you can give them… So pressing on, here are the first happy couple.
You saw the Santa back in the summer if you were following me then, if not here is the link back. The one thing I did add to Santa is his sack. I was waiting to make Mrs. Claus to see if I would have her holding the sack in front of her but once I got there, I didn’t like that look so much. The bows on the packages are made with ribbons, a tip I learned from clay doll artist, Deb Wood.
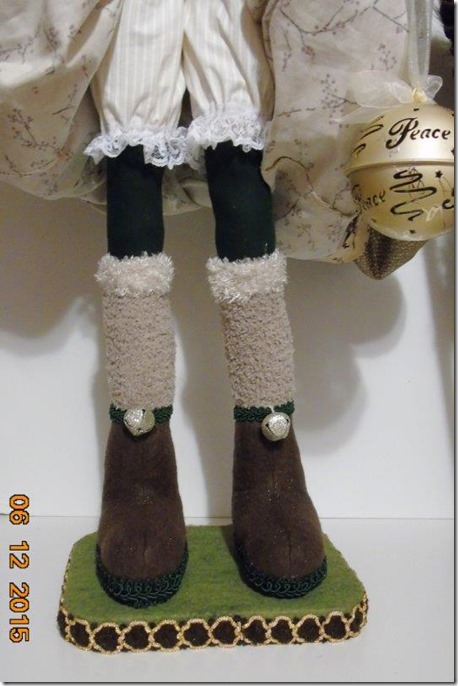
And here is his missus.. the design doesn’t call for knickers like these, I just don’t like the idea of not having all the lady parts covered. (even though it’s a doll)
The base is done my usual way with two colours of felt, her socks are adult socks cut down and stitched to size. The boots are felt with a glittery jingle bell to announce her arrival. The tops and bottoms of the boots are trimmed with two sizes of upholstery gimp. That big jingle bell is a true jingle bell. There is no mistaking the sound when I move her around.
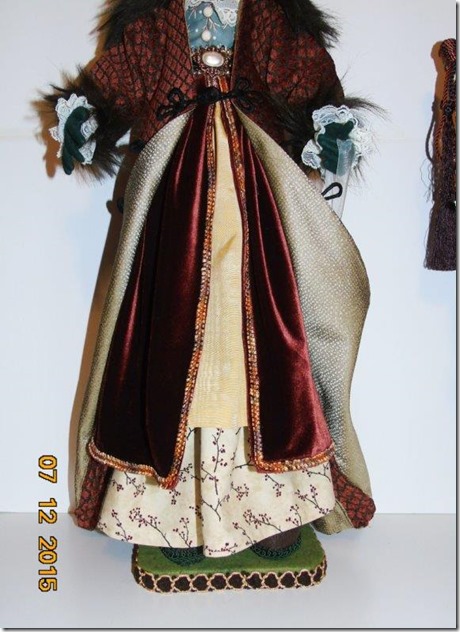
There are three layers to her skirt. The underskirt is a cotton print with what looks to me like cranberries on stems. The middle layer is gold coloured taffeta, the top skirt is brown stretch velvet. I’ve trimmed the front of top skirt with a type of gimp that I found on Joggles a long time ago.
At her waist which you can’t really see, I used a wide metallic trim along with a faux pearl/metallic button. The same button is used at the neck trim but turned the opposite direction.
I’ve pulled her coat open so you can see the lining. It’s a polyester type of fabric, a very pale gold tone.
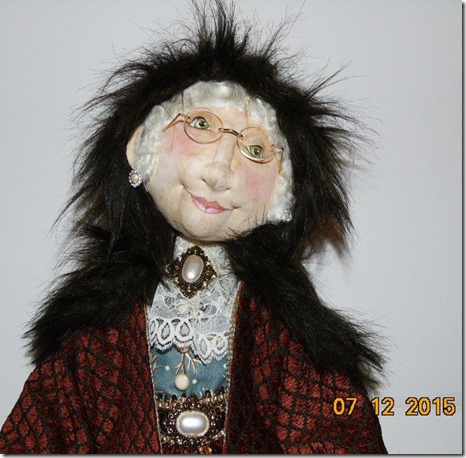
In this picture you can see the neck area with the lace and button trim. I used some cream/brown toned vintage buttons on her bodice. Hard to see I know. The hair is tight curls of mohair locks needle felted in. I’ve given her rhinestone drop earrings and kept the details of her face very simple. Funny how pictures can make noses look odd, like there are wrinkles where none exist. ;o) I didn’t realize it until I was done adding the hair, that I had just channelled my neighbour, oops, but she is pretty cute.
The hood and cape are made with faux fur. There is no pattern for the hood and the cape is modified a bit from the original to fit the hood.
The coat is made with an upholstery fabric. It drapes beautifully and even more being lined. I used some black frog closures, so the customer can leave the coat open or close it, whatever they prefer, or change it to suit the day. The hands are made with dark green felt matching the colour on the boots. The lace on the wrists is the same as what’s on the neck, and finished with fur trim.
And how the coat looks done up. She looks pretty classy to me as befitting her status.
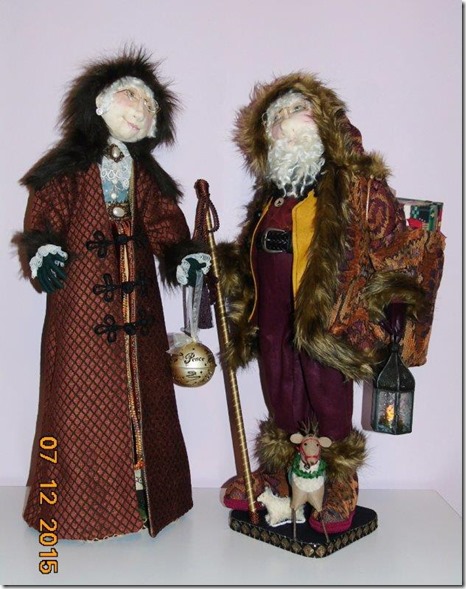
And here are the happy couple together at last. A front and back view. See you soon with the other couple, I say so optimistically.


Really wonderful. Your client will love them.
ReplyDeleteLovely Mr Nd Mrs Clause
ReplyDelete