The Santa I made recently for a customer was very well received, so well in fact, that he’s ordered two more Santa’s and two Christmas stockings. I have one of my Victorian Santa’s left from last Christmas and I’m going to tweak that one a bit for him, and that just leaves me one more to make. He definitely knows what he wants, and that is not a red and white Santa. However this new Santa does have a red coat but nothing at all like a Coca Cola Santa. This one is more a Vintage Santa, the other two are Victorian.
It’ll be done in the next couple of days, but these are just a few steps in the process to share with you. This particular Santa’s body frame is made with dowels rather than making a wire armature. The main part of the frame is built around the hips. One center dowel to go through the stuffed body up into the neck with two dowels going down for the legs. Smaller dowels are used to widen the hip area.
After stuffing the body, there is still a portion of the hips showing. That portion is wrapped with duct tape and the bottom of the cloth body is gathered and secured around the hips. I added extra stitches between the legs to secure it more to the bottom of the body for more strength.The leggings come up and meet in the same area. I’m not a perfectionist and even though that area will never be seen due to the costuming, I will know it’s there.
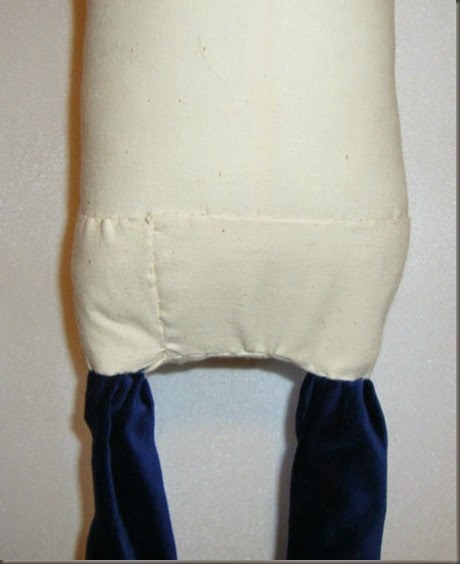
The first extra step I did was to enclose the bottom area of the hips. With muslin, I fashioned a bit of a diaper and stitched that in place. It just feels properly finished now.
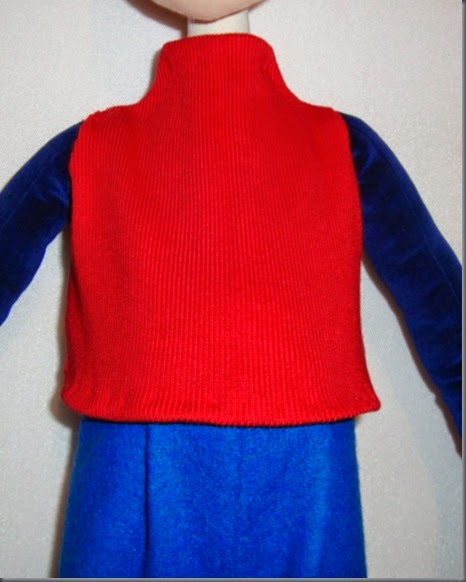
The second step is in regards to the body. It’s a muslin body but there is nothing in the costuming for a shirt to cover the body. I made this little tunic type top with a ribbed knit to cover the body. It’s sleeveless because I made the arms with velvet and once the coat sleeves are on, there won’t be much room to fit sleeves in there.
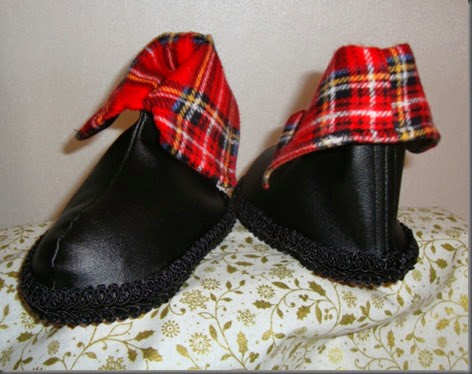
The last thing I did was line the upper part of the shoes. In the directions, it’s not explained what to do with the flaps at the top of the shoes. I assume they are meant to wrap around the legs to add support. The lining will add more volume to the flaps, so better support. I used a vinyl fabric and did top stitching on the back. There are leather soles and the base is trimmed with black gimp. The lining is flannel and is the same fabric I’m using on rest of the doll.
The extra steps, well, probably most might not worry about doing extra bits. My personal approach to my doll making is to do the best you can. If you have to take more time than others, who cares. Doll making should not be a race to the finish, it’s supposed to be fun. There is nothing I hate more than when I hear someone say, “oh that’s good enough” and that’s just not how you should view your work. Those kind of statements are maybe a sign that you’re not enjoying what you’re doing or worse, you think nobody will notice that you slacked off. I would feel so embarrassed and disappointed in myself if I did that and then tried to represent myself as a doll maker and artist.
Do your best work and when you give it as a gift or sell it to a customer, you will feel so good to know that if someone tries to peek inside the costume and they see all those nice finishes, they will see your good work shine through. More to come soon….;o)


Love how this Santa is coming along! Yes, it's good to know those "finishes" are neat even though maybe nobody will see them.I am a bit of a perfectionist, but as you say, as long as you do your best, and enjoy what you're doing, what more can you ask.
ReplyDeleteJudy